How to Adjust Idle On An ATV
Your ATV idle has to be properly adjusted or both your ride and your machine will suffer. An idle that’s too low can cause engine stalling that may keep the vehicle from being able to run. An idle that’s too high can make shifting and steering difficult and cause excessive wear on your drive belt. This post will tell you how to adjust idle on ATVs so you can avoid either problem.
Understanding ATV Idle
You can better appreciate the problem and how to fix it if you understand what you’re working with.
Your engine is at idle when you’re riding at no load without any throttle. The engine turns only slowly at this point.
Idle adjustment makes the engine turn at different rates. When it’s set high, the engine turns at a faster speed. When it’s set low, it turns even more slowly than normal.
Do You Need ATV Idle Adjustment?
Before jumping right into how to adjust ATV idle, we should cover other potential reasons your ATV isn’t idling correctly. It may not be your adjustment. If it isn’t, adjusting it won’t fix the problem. In fact, you’ll have a new problem whenever you fix what is really causing the issue.
So, consider or check the following before you go on:
- A clogged air filter
- A clogged fuel filter
- Stale or contaminated gas
- An issue with the carburetor
- A choke that’s stuck
- An issue with the throttle
- A faulty idle-bypass-valve
- Problems with your sensors
- A temperature change
Correct Idle Speed
You’ll have to read your owner’s manual to determine the correct idle speed for your machine. It’s common for the ideal speed to be as low as 1100 and as high as 1700, but you need to know which one is right for your ATV.
Can You DIY ATV Idle Adjustment?
Some ATVs are more friendly to DIY idle adjustment than others. If you own a carbureted ATV or one with a throttle cable, then it should be fairly easy to do your own idle adjustment. With most fuel-injected ATVs, the idle is controlled by the ECM and can only be adjusted by a mechanic.
How to Make ATV Idle Speed Adjustment
How to Adjust Idle Speed on ATVs with Carburetors and No Throttle Cable
Drive your ATV for around 10 minutes so the engine can warm up. Locate your carburetor. It may have a plastic cover. If it does, remove the cover.
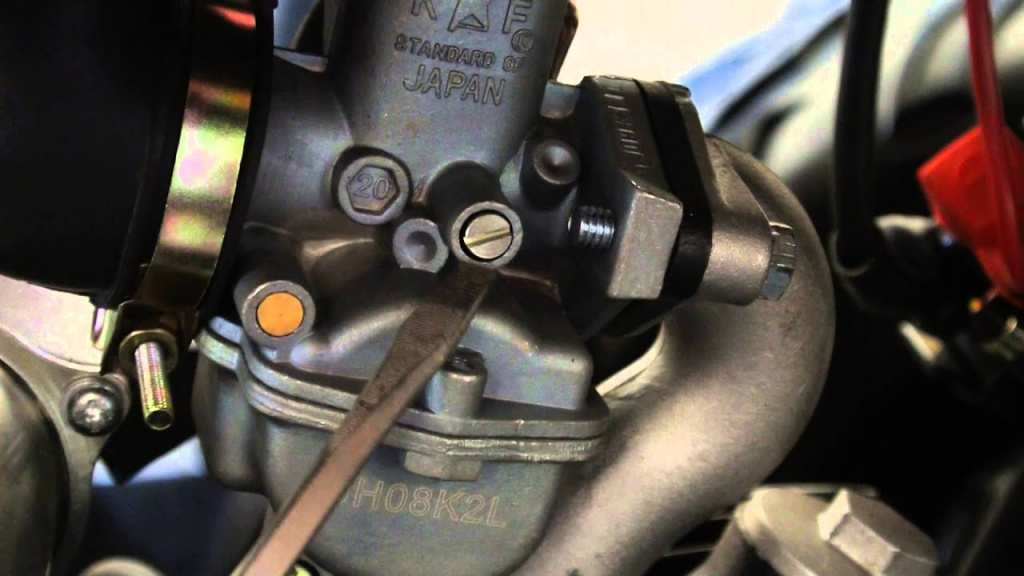
Find the ATV idle screw on your carburetor. It is a brassy color and can be adjusted with a Phillips head or flat head screwdriver. You can usually find it on one of the sides, but sometimes it is on the front.
Determine the idle speed you have now. You can’t adjust it without knowing where you are adjusting from. You can read the RPMs off the instrument panel or aftermarket tachometer. It’s also possible to tell if it’s too low by the sound it makes.
Make sure you have your screwdriver straight before you try to adjust the screw.
Turn the idle screw clockwise to make it idle higher, and turn it counterclockwise to make it idle lower. If you have a tachometer to measure the RPMs, you can read its gauge to see when your idle is set correctly. If you are using the listening method, turn the idle screw until you turn it so low it makes the engine stutter. You can then turn the idle screw back up about half a turn to find the perfect spot.
How to Adjust the Idle on Quads with Throttle Cables
Drive the ATV for about 10 minutes to get it at regular operating temperature. Find the throttle cable adjuster. It’s usually located at the thumb throttle. It may be covered by a rubber grommet. If it is, lift that up.
There will be a locking nut under there. You can loosen it with either your hand or a wrench. You want it just loose enough that you can move the locking nut.
Determine what your idle is set to by either a tachometer or by listening. Then turn the adjustment screw or sleeve clockwise to increase the idle speed or counterclockwise to decrease the idle speed. Note when the RPMs on the tachometer match your ATV’s required speed or when the engine sputters and then turn it half a turn clockwise.
Retighten the locking nut. You’ll probably have to hold the adjustment screw so that it doesn’t move when you tighten the locking nut. Then put the rubber grommet back.
How to Adjust the Idle on Four Wheelers with Fuel Injection
The ECM controls the AFR or air to fuel ratio on these ATVs. If they are not idling correctly, it is usually caused by one of the other problems listed above and not idle adjustment. If the idle does need to be adjusted, you’ll have to take it to a mechanic.


