How to Tune ATV Shocks for Different Terrain Types
Shocks are instrumental to enjoying rides, as they help stabilize the quad, but the configuration that might be ideal for one terrain might not befit another terrain. Hence, adjusting your ATV shocks to suit the terrain you are travelling becomes necessary.
However, adjusting ATV shock absorbers is not what most ATV owners can do, as the task involves different workarounds. When adjusting shocks and suspension, you are faced with different tasks, including adjusting the preload, ride height, speed clickers, and rebound.
This piece takes a look into what to know about tuning ATV shocks for different terrain types.
How Do ATV Shocks Work?
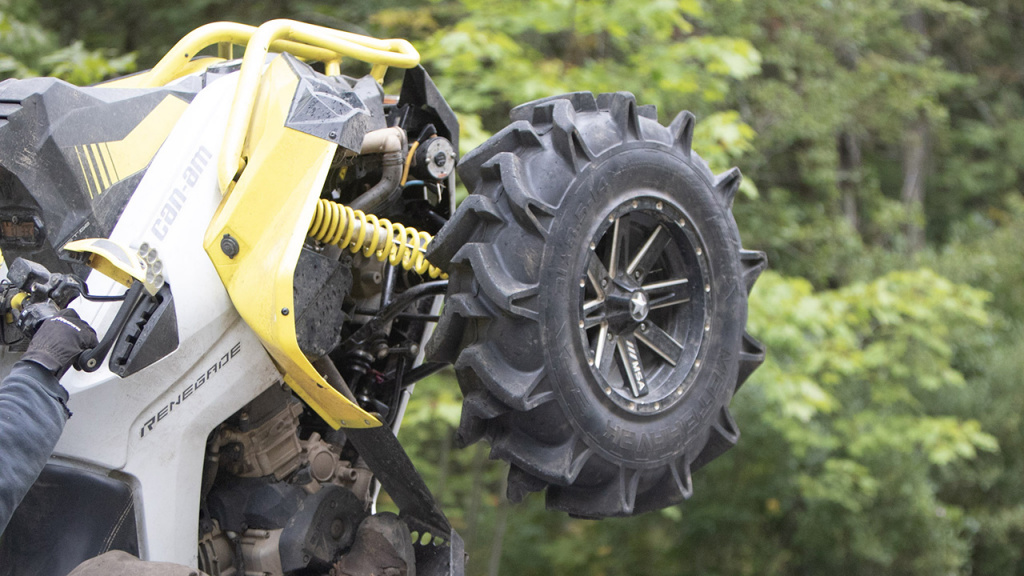
Shocks are a part of the suspension system, and how good they are, reflects on what to expect from the suspension. Though ATV suspension contains different parts, the shocks and springs play the major roles, which are discussed here.
The role of shocks in a suspension is to absorb the impacts of the terrain travelled. For example, if you drive over an uneven road without shock absorbers, you will feel every bit of the impact of the rough road. This is not so with well-adjusted absorbers. Shocks, also known as shock absorbers, easily compress to absorb the force acting on your ATV.
Also, while shocks are of different types, common types come with oil. The oil in absorbers helps prevent them from compressing as they adjust to neutralize the force acting on your vehicle.
The spring in a suspension system also achieves the same aim as the shocks, ensuring the suspension returns to its original position without compressing when it goes over a rut.
The Types of Shocks Available
The shock market is filled with different types of suspension. Hence, it is important to know the common types of shocks before forging to how to adjust your suspension. However, it is worth noting that some types of shocks don’t allow certain adjustments. Hence, you might need to agree with the default configuration for the particular need.
Here are the two major types of shocks you are likely to get your hands on when you shop for ATV shocks:
Monotube Shocks
The monotube shock is the most common type of suspension within ATVs and usually comes as standard. They are the oil-filled type of ATV shock absorbers and have an advantage associated with the oil tube.
The oil in monotube shocks is prone to heating up due to the frictional effect of the shock movement. This might not be an issue until the heated oil starts to form foam, reducing the effectiveness of the shock.
Remote Reservoir Shocks
Remote reservoir shocks work similarly to monotube shocks but with a different system; they have their oil reservoirs separated from the shocks. The “piggybank” reservoirs are located near the shocks and not inside, which helps eliminate the “heat” advantage associated with monotube shocks.
How to Adjust Front and Rear Shocks on ATVs
Now that you understand how ATV shocks work and the types you are likely to come across, let’s dive into the meat of the guide.
Here are the major steps on how to tune ATV shocks:
1. Getting Started
The first step to your shock-tuning assignment is ensuring that your ATV tires and wheels are in excellent condition. Remember, your tires and wheels contribute to your ATV stability when driving. Hence, if your tires are not well-inflated, you might not have the best result with your suspension tuning.
2. Adjusting Your ATV Ride Height
Your ride height should come first when adjusting your ATV shocks, which is achieved using the collars or snail cams that come with your shocks.
Some shocks come with threaded collars, meaning you might need to consult your owner’s manual to know what to stick with. Also, though applying the same adjustments for all the shocks is advisable, you can choose different adjustments for ATV front shocks and ATV rear shocks if you want your rear to be higher than your front.
Lift your ATV and start the suspension adjustment process by loosening the locking collar, which gives you access to threading the adjustment collar up or down. Whether you tighten it up or down depends on the terrain type and how stiff you want your shocks. If you want a stiffer ride and higher ride height, tighten it. On the contrary, loosen the thread if the terrain requires a softer ride with a lower ride height.
3. Adjusting ATV Speed Clickers
Adjusting clickers is one of your tasks when tuning your ATV shocks. Most ATVs come with two clickers: high-speed and low-speed clickers. It is advisable to start with the high-speed option, and if your ATV comes with only one clicker, adjust it by following the instructions for the high-speed adjuster.
Before adjusting your clickers, you need an object that acts like bumps on your terrain. All you need is the impacts they have on your vehicle.
High-Speed Clickers
Starting with the high-speed clicker, hit the bump and pay attention to your suspension. With the right adjustment, your suspension should bottom out. If you feel much impact of the hit, it only means one thing – your clicker needs further adjustment. Hence, loosen your compression with two clicks. Do this until you get the best result.
Low-Speed Clickers
While you might be good to go with adjusting your high-speed clicker only, adjusting your low-speed clicker makes your ride more enjoyable. The adjustment also requires the same procedure as for the high speed but with a set of bumps. If you feel thrown out with every bump, your low-speed clickers are too soft for your suspension setup and should be tightened. Also, if you feel shaky as you hit the bumps, your low-speed clickers are too stiff and should be softened.
Continue with the suspension adjustments until you achieve a smooth ride.
4. ATV Shock Rebound Adjustment
You are not done tuning ATV shocks without your rebound adjusted. Rebounds see to how your shocks extend when compressed due to the impact of rough terrains. If your machine takes some time bouncing up and down before settling after hitting a bump, it indicates your rebound is too loose and should be tightened. Also, if your suspension stays compressed for too long, it is too tight and should be loosened.
Regardless, start your adjustments by loosening your rebound to the extreme. This way, you can walk your way up by tightening the rebound with the set screw or dial and noticing the response from your ATV. Remember, you tighten your rebound by turning the screw clockwise and loosen it by turning counterclockwise.
That’s everything on tuning your ATV shocks!


