How to Check Your ATV After a Common Mud Riding Day
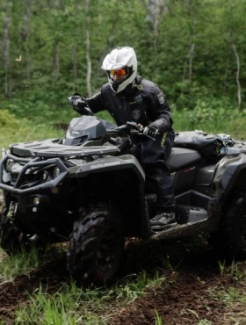
So, you’re ready to come home after you’ve gone mudding with your buddies – now it’s time to check your ATV and get your quad clean. It may not seem like much, but there are so many things that can harm your ATV or UTV out there. It’s important to know the best way to clean mud off of an ATV at the end of the day. You have to check literally every component well, and more importantly, clean them. Make a checklist and follow these tips to learn how to check your ATV after a common mud riding day.
What Hurts Your Quad the Most?
When you go mudding, there are certain parts of your 4-wheeler or ATV that will get exposed to the mud regardless of whether or not you have snorkels and other mud-ready gear installed. Here are some things that need to be done on a regular basis – especially when you’ve gone mudding all day.
-
Always be sure to check the air filters. Whether you have snorkels or not, you need to check the air filter. Not cleaning it will cause major engine damage due to the intake inhaling mud, dirt, or debris.
-
Always take a good look at the radiator. You also need to know how to check your radiator for debris and how to clean mud out of an ATV radiator when you go mudding. If you don’t, you could very well cause your engine to overheat (among other problems due to overheating). You can opt for a pressure washer, or if you don’t have one, head to a car wash. If you can’t do either, a garden hose with a pressure adapter will do the trick in a pinch.
-
Tighten your lug bolts. When you’re off-roading in the bog, it’s easy for lug bolts on your tires to loosen just slightly. Over time this can be extremely dangerous.
-
Grease your ATV again when it is clean. If you don’t grease things like the bearings, steering, front hub, and pivot bolt, you aren’t ensuring a smooth operation. Check all these parts to make sure they’re greased well.
-
Don’t let water get into the engine. If water gets into your fuel tank, line, intake, or oil, this will cause a lot of problems and can destroy your ATV’s motor in a heartbeat.
-
Wash the filthy thing. Just like a pig wallowing around in the mud pit, you covered your ATV in mud. You should always wash your ATV after mudding.
How to Maintain and Wash Your ATV After Mudding
Of course, you need to wash your ATV after you get done on any common mudding day. In order to do so, you need ample time to look over everything – such as checking the oil of the engine, checking the CV belt (or changing it if necessary), provide a gas treatment to clean the fuel lines, and scrub scrub scrub! You also need to look at all of the boots for the steering and the parts of the wheel and tire to ensure that they’re safe.
How to Clean an ATV Covered in Mud
As mentioned above, a car wash will do if you don’t have access to a pressure washer, then either rent one or take a high-pressure host to it. In order to clean mud off of an ATV, you may need to buy special cleaners. If you do decide on the DIY method, then be careful not to get anything that could damage your ATV. Always check every inch thoroughly for hidden mud that could damage your ATV.
If your quad ended up getting doused in mud (which more than likely it did), you may want to check it over a couple of times with a “pre-wash” sprayer hose rinsing to clean the mud off of the ATV. But there are some things you need to do first to get rid of the loose debris so you’re not wasting time and more money on soaps and cleaners.
Here’s the Best Way to Perform ATV Maintenance After Mudding
Now that we’ve covered the basics, here is the nitty gritty, step-by-step manual on how to wash your ATV after going mudding.
-
As mentioned above, if you have a small rubber mallet or even a thick leather glove, tap all around your ATV’s body to knock off large hunks of mud. Then you can use your water soak to loosen the mud up more.
-
Take the pressure garden sprayer, pressure-wash hose, or car wash hose and spray the heck out of it with a swift power wash.
-
Add soap and even though most of the mud will be gone if you did the initial sprays right, this will help get rid of the oils and additional spillage from the rinse cycle.
-
Dry with a towel or use a high-powered object like a leaf blower or shop vacuum. Be sure to check the tires thoroughly.
-
Check the internal engine and electrical components, and fluid levels of your ATV.
-
Seal it up and re-grease it. If you have a winch installed, now would be a great time to despoil and rewind your entire cable to make sure there are no snags, cleaning it as you go.
There you have it! With a lot of elbow grease, real grease, and dedication, you will be knowing how to check your mud-ready quad and maintain it properly after a long day of mudding!


