How to Properly Maintain and Repair Your Waders: The Ultimate Guide for Anglers
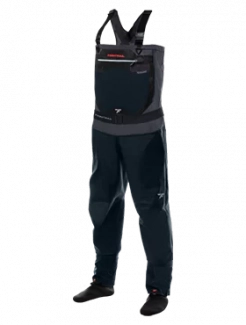
Waders are a vital piece of equipment for anglers, hunters, and anyone who spends time in wet, muddy, or marshy environments. These waterproof garments act as a barrier between you and the elements, allowing you to move freely through rivers, lakes, or boggy terrain while staying warm and dry. Whether you’re casting flies in a chilly mountain stream, setting up decoys at dawn, or trekking through soaked vegetation, your waders are working hard to keep you protected.
Considering the investment that high-quality waders require — whether made from neoprene, nylon, or breathable multi-layered fabrics — it’s essential to understand how to properly maintain and repair them. With the right care and repair strategy, waders can last for many seasons. This guide will walk you through essential wader maintenance routines, explain how to detect and repair wader leaks, outline the tools you need for wader repairs, and help you decide when to attempt a DIY fix and when to rely on professional wader repair services.

Why Wader Care and Repair Matters
Even the most durable waders are vulnerable to wear and tear. Every outdoor excursion exposes your waders to potential damage — be it from sharp rocks, thorny underbrush, or the slow breakdown of materials over time. Small punctures, seam leaks, or cracks in the booties are common issues. The good news is that regular wader maintenance and early repairs can prevent small problems from becoming big ones. Taking the time to inspect and repair your waders as needed helps avoid costly replacements and ensures that your gear remains functional for as long as possible.
Wader care isn’t just about patching holes — it’s also about preserving performance. Breathable waders, in particular, require regular cleaning to maintain airflow and prevent sweat and condensation from building up inside. Proper maintenance helps prevent odor, mildew, and fabric delamination, all of which can compromise comfort and waterproofing.
Cleaning Waders the Right Way
A clean pair of waders is less likely to degrade prematurely. After every outing, even if your waders look relatively clean, they should be rinsed to remove dirt, grime, and biological contaminants like algae or fish residue.
Start by spraying or rinsing your waders with clean, cold or lukewarm water. Avoid hot water, which can damage the adhesive layers that keep your waders sealed. Use a soft brush or cloth with a mild, non-detergent soap to gently scrub the surface. Focus on seams, gravel guards, and any zippers. Rinse thoroughly and avoid using bleach, fabric softeners, or strong detergents, especially on neoprene waders, which are sensitive to harsh chemicals.
Zippers and buckles also need attention — clean these with fresh water to avoid salt or sediment buildup, which can cause failure over time. Maintaining all parts of your waders will prevent issues that require avoidable repairs later on.
Drying and Storing Your Waders
Drying your waders properly is another key aspect of maintenance. Moisture trapped inside can lead to mildew, foul odors, and premature fabric degradation. After rinsing, turn your waders inside out and hang them by the boots or suspenders in a cool, shaded area. Once the interior is dry, flip them right side out to dry the exterior. Avoid drying them in direct sunlight or near heat sources, as excessive heat can warp the materials and compromise seams — leading to the need for more repairs down the road.
For storage, hang your waders vertically in a cool, dry place. Never stuff them into a tight bag or pile them in a corner, as this can create creases that weaken the fabric. Long-term wader storage in high heat or damp areas will lead to damage that even the best repair job may not fully fix.
Identifying Leaks in Waders
Before you can begin a wader repair, you need to locate the problem. Leak detection is often the hardest part of the repair process, especially if the hole or tear is small. Fortunately, there are several effective methods for finding leaks in waders.
One of the most common techniques is the water test. Fill your waders with clean water and look for visible drips or dark spots. Hanging them upside down can help force water into the legs, revealing leaks faster. For breathable waders, spraying the inside with rubbing alcohol is highly effective. As the alcohol spreads through the fabric, leaks will show up as dark wet spots almost immediately. For boot foot waders or built-in booties, submerging just the feet in water and looking for bubbles can pinpoint holes and cracks.
Detecting a leak early allows you to perform a simple wader repair before it worsens and affects your day in the field.
How to Repair Waders Properly
Once you’ve located a leak, the next step is applying the correct wader repair technique. For tiny punctures or pinholes, a small amount of urethane-based sealant like Aquaseal can provide a long-lasting fix. Start by cleaning the area with rubbing alcohol to remove oil and debris. Then, apply a dab of sealant directly over the hole and smooth it out with a brush or tool. Let the repair cure fully — ideally overnight — before using your waders again.
If you’re dealing with a larger tear or abrasion, a patch is often necessary. Clean and dry the damaged area thoroughly. Cut a patch slightly larger than the hole, and apply adhesive to both the patch and the surrounding wader fabric. Press the patch firmly into place and allow it to set under pressure if possible. Some patches come pre-glued and require only pressure to bond.
Whether you’re fixing a small leak or a major tear, taking the time to properly complete the wader repair is essential to restoring performance and preventing future failures.
Repairs for Specific Wader Materials
Different wader materials require different repair approaches. Neoprene waders, known for their warmth and stretch, respond well to neoprene cement or flexible urethane adhesives. For cuts or tears, apply adhesive to both sides of the neoprene and press the edges together. Use clamps or weights to keep the surfaces bonded as the repair cures. For large holes, use matching neoprene patch kits. Reinforcing stress points with neoprene tape adds strength and durability.
Nylon waders are lightweight but more susceptible to tears. A reliable wader repair method for nylon involves using vinyl adhesive or strong patching tape like Tenacious Tape. Apply the patch over a cleaned area, then use a sealant to reinforce the edges for a watertight fix.
Breathable waders, which often use materials like Hadr-Tex, require breathable-friendly sealants and patches. Avoid heavy materials that could interfere with breathability. Lightly coat pinholes with Aquaseal on the inside, and use specialty patches for more serious damage. Always take care to preserve the flexibility and breathability of the fabric.
Must-Have Wader Repair Kit Items
No serious angler or outdoor adventurer should be without a basic wader repair kit. Your kit should include a tube of Aquaseal or similar urethane sealant, a selection of material-appropriate patches, alcohol wipes for cleaning, and a small pair of scissors or knife. A seam sealer, brush, and gloves can also be helpful, especially for at-home repairs. Having these supplies on hand can save your trip if your waders spring a leak in the field.
When to Let the Pros Handle the Repairs
Not every wader repair is a DIY job. If your waders have multiple leaks, delaminating seams, or issues with zippers or integrated boots, it's often better to consult a professional. Many manufacturers offer repair services, some of which are covered under warranty. If you're unsure about your ability to fix the damage or simply want a high-quality repair, reaching out to a repair specialist can extend the life of your gear.
How to Avoid Wader Damage in the First Place
Prevention is always better than repair. Avoid sitting or kneeling on rough terrain. Always rinse your waders after saltwater use. Store them properly and avoid drying them in cars or direct sunlight. If you fish frequently, rotating between two pairs of waders can reduce wear and tear and give you a backup if one pair needs repair.
Final Thoughts on Wader Repair and Maintenance
Waders are a critical part of your outdoor kit, and treating them with care will reward you with years of reliable performance. Understanding how to perform routine maintenance and learning effective repair techniques will save you time, money, and frustration. Whether you’re patching neoprene, sealing nylon, or restoring breathable fabric, the core principles remain the same: clean, dry, patch, and seal.
With the right tools, a bit of patience, and a commitment to keeping your waders in good shape, you’ll spend more time focused on your adventures — and less time worrying about wet socks.