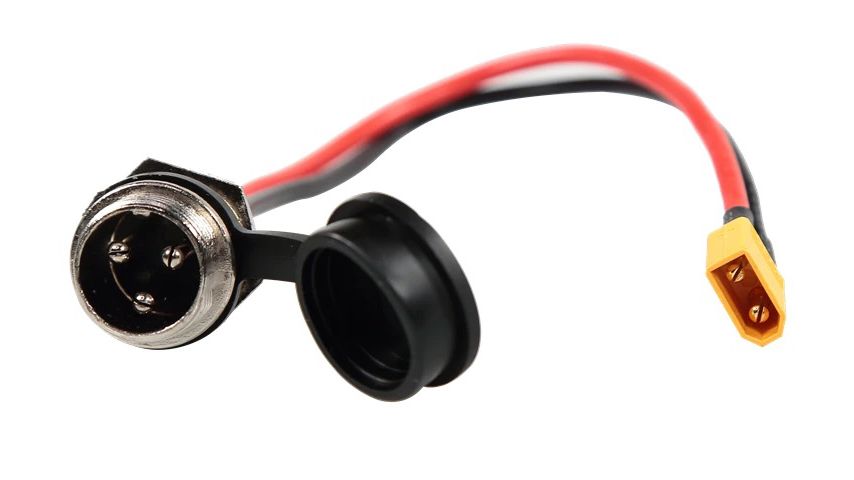
How to Change the Charging Port On Your Electric ATV
Battery powered ATV maintenance is almost exclusively about the battery and being able to charge it. So, it’s not surprising that you might run into the need to change your charging port should something go wrong and you can’t charge your electric ATV. Read this post to learn how to change the charging port on an electric ATV.

Why You Might Need to Replace Your Battery 4 Wheeler Charging Port
Either the wires or the charging port could get damaged.
Pests could gnaw on the wires.
You could get too careless with the charging port while trying to charge your electric ATV and bend or break something. Or your ATV could suffer some kind of damage that happened to impact the charging port.
You could damage the wires by overtightening the screw on the charging port. Though the charging port comes with the screw, you don’t usually have to use it and it poses unnecessary risk to the delicate wires. It’s best to just leave it alone. If you do need to use it to keep your electric ATV charger in place, only tighten it a little.
How to Replace a Battery Powered Four Wheeler Charging Port
This is a very easy repair.
Before you work on your electric quad charger port, you’ll need to remove two fuses to work with these wires safely. Remove the main fuse in the fuse box on your vehicle. It will probably have a little red cover and be located under the frame on the front half of your battery 4 wheeler. You’ll also need to remove the cartridge fuse that is housed on a wire running from your charging port to your motor. Sit these aside somewhere safe and easily visible, because they’re small and you don’t want to lose them or for anything to damage them.
Remove your seat. You’ll then gain access to the back side of your charging port and the wires housed back there.
A battery powered 4 wheeler charging port will have a hex nut that needs to be removed. It might take a wrench, but you can probably do it with your hand. That is all it takes to remove the charging port itself. The wires are connected to a white plastic harness not far from the charging port. You can press on the little plastic nob to separate them.
Get your replacement charging port and prepare to connect the wires attached to it. You’ll notice there are two wires, one red and one black.
When you attach the replacement wires in the harness, make sure you line the red wire up on matching side of the harness to the red wire that goes to your motor so they run together in a line.
If your harness is attached backwards so you can’t line the wires up, you can stick a small object inside the empty harness and remove it from the wires that go to the battery and just turn it around and reinstall it.
Once you have the wires situated, you can stick the new charging port in the hole and screw on the hex nut, and you’re good to go. Just plug in your charger for your electric quad and prepare for your next ride.


