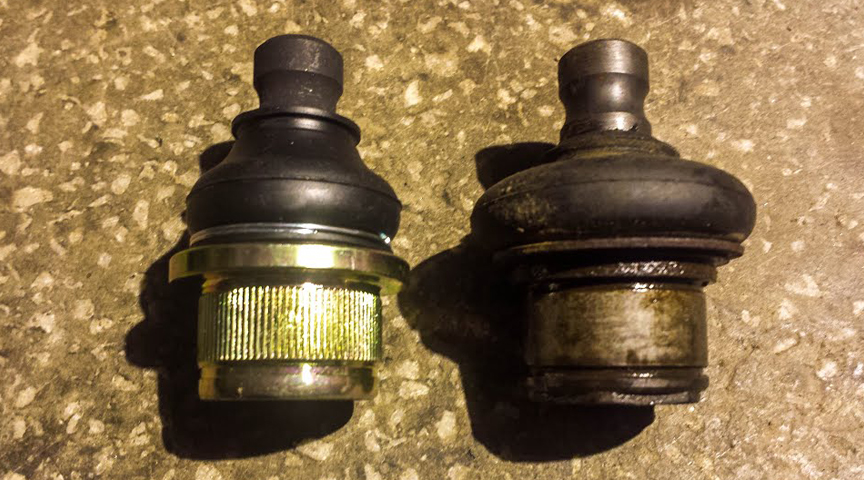
How to Check ATV Ball Joints
If your steering feels off and you’re hearing clanking noises, you should check your quad ball joints. They interact with your steering and your suspension and are a crucial part of your machine. Thankfully, they usually give you a heads-up when there’s a problem. Make sure to take advantage of that warning by reading this post on how to check ATV ball joints so your ball joints don’t completely fail.

How to Tell If ATV Ball Joints are Bad
Your ATV has several ball joints, and they are all housed in rubber boots with grease. This keeps the ball joint thoroughly lubed. If the boot gets damaged, there is less lubrication and water and grit can get in. This is a bad combination. Your lube is compromised, and you’ve got the potential for corrosion and damage. Your steering may feel stiff at this point because the ball joint starts to seize. The A-arm ball upper and lower joints are the most common culprits, so we’ll start there.
A-arm Joints
Lift the front of the vehicle and make sure to use jack stands. Then eyeball the A-arm ball joint for visible tearing or leaks.
Hold the ball joints (one at a time), and have someone grab the tire in the 6 o’clock position and rock the tire back and forth from top to bottom. A tire with a good ball joint behind it will barely move. If the ball joint is worn, you’ll feel too much play or hear a knocking sound. If you didn’t feel a problem with either of the ball joints, a bad wheel bearing could be the problem.
Steering Ball Joints
This test is similar to the one above. You will hold the steering ball joints (also called a tie rod end), and have someone grab the tire at about 3:15 and wiggle the tire side to side. Movement or a knocking sound when doing this indicates that this ball joint is worn.
How to Replace ATV Ball Joints
Don’t be surprised if you find that all of your ball joints are somewhat worn. You could only replace ones that are significantly worn, but you’ll be setting yourself up to do this again in the near future, so you might as well replace them all now while you’re at it.
A-arm Ball Joint
You can replace the ball joints with regular household tools, but you will have to remove the A-arm to do it. A special ball joint tool like an ATV ball joint separator or a Tusk ATV ball joint tool makes it much easier, and you don’t have to take off the A-arm. A shop press will be a more precise method as well so you don’t have to hammer at your machine.
To do the job without the special tool:
-
Remove the tire.
-
Take off the caliper, without disconnecting the brake line, and support the caliper with a bungee cord, mechanics’ wire, or something similar.
-
Remove the tie rod. It’s connected with a nut and will probably require a knock at the knuckle to loosen.
-
Take off the bolt on the lower shock and hold it up with a bungee cord or mechanics’ wire.
-
Remove the ball joint you intend to replace. It will be installed with a pinch bolt or nut, and you’ll probably have to hit the knuckle.
-
Take off the inside A-arm bolts and put the arm aside.
-
Use snap ring pliers to remove the snap from the ball joint.
-
Apply WD-40 to both sides of the joint.
-
Hold the ball joint with a large pipe or a deep socket while you hammer the ball joint pin loose.
-
Clean the socket with a rag.
-
Lube the socket.
-
Use the pipe or deep socket to install the ball joint pin.
-
Put the new ball joint in place.
-
Hold the ball joint in place with the pipe or deep socket and hit the socket until it is seated.
-
Install the new snap ring and double check it with a close eyeball inspection to make sure it is seated correctly (Some snap rings have to be installed with a certain face up, so read your instructions).
-
Put all the parts back in place, but make sure to have the machine on the ground before you tighten the A-arm chassis bolts.
Tie Rod Ball Joint
You can replace your tie rod ball joint by:
-
Loosening the tie-rod lock nut by a half turn.
-
Removing the ball joint nut (There may be a split pin).
-
Knock at the knuckle to get the ball joint out.
-
Turn the tie-rod counterclockwise and remove it.
-
Install the new tie-rod, using the witness mark from your old tie-rod to guide you.
-
Align your ATV.


