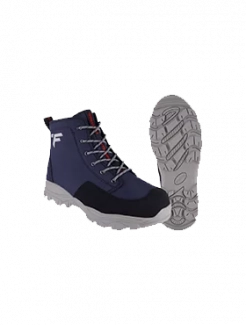
How to Install Doors for Polaris Ranger
The soft doors on some of the Polaris Ranger models have been a point of contention for long time Polaris lovers. If you’re experiencing any issues with the flimsiness or unreliability of these soft doors, it may be time to install hard doors on your Polaris Ranger. Luckily enough, there are a lot of hard doors out there that you can pick for your Polaris, and you can get them installed at home without much help at all.
Everything that you need for the installation will come when you purchase the doors from Polaris. While we all wish they would just do the installation from the get-go, we’re here now and are putting the doors on by ourselves. A Polaris Ranger door installation should be easy enough to complete by yourself if you can follow all of the directions we lay out here. It’s most likely going to be much easier than the last time you built anything from Ikea.

Lower hinge pivot
The first step of a Polaris Ranger door installation is to install the lower hinge pivot. If you hit the dump latch on the bed, you’ll see a huge cab bolt that has two screw holes on the side of it. This is exactly where you’ll attach the lower hinge pivot. Don’t tighten these all the way down yet, but just enough to support weight. The movement in the system will allow for adjustments at the end.
Prepare and hang the doors
Now, bolt the two hinge plates onto the doors so you can hang them. The longer plate will be on the bottom of the door, the shorter up top. Remember not to fasten anything all the way down just yet.
Hang the doors by placing one of the black nylon washers on the hinge post that was installed earlier. With a little bit of grease on the post, you can set the door down on the lower hinge. Now you’ll do the same with the upper hinge post and it may be helpful to have a second set of hands. If not, work on your balancing act and get creative.
Install the upper hinge
Next up is installing the upper hinge. You have the door sitting in the frame, but you need to ensure that the hinge lines up with the bolt holes of the roll cage. This is why you didn’t tighten everything down, as you can shake the door a bit to make it move into position. Slide the flat bracket with two nuts on it behind the square bracket on the roll cage with the flat side facing out. While you hold that you can install the bolts on the outside.
Make adjustments
With the doors shut, you can inspect the gaps and see if anything needs moved around. Hold the door firmly in place where the weather stripping is lined up and covering all of the gaps. As you hold the door, you can secure down all of the bolts that were still loose to 17-pounds of torque.
Install latch striker
Finally, you need to install the latch striker so the door will shut and stay shut. All you need to do is loosely install the latch striker which will engage in the locking mechanism of the door. You can keep this loose in order to make adjustments like you did earlier on. Afterward, tighten it down to the 17-pounds with a torque wrench that you did for the rest of the bolts.