How to Lubricate ATV Control Cables
Cables are an essential piece in an ATV. Every ATV is equipped with a few cables. Control cables are one.
Maintaining these cables is essential to keeping an ATV in good condition, and one good way to do this is by lubricating them. Lubricating ATV control cables is important when you have just got a new cable or as a maintenance tip.
Failure to lubricate your control cables results in dirt accumulation, a potential cause of stiffness and breakage of the cable.

ATV Control Cables Lubrication
First, it is worth noting that cleaning and lubricating your ATV's control cables is necessary at least twice a year or whenever you notice that the clutch and throttle feel stiff.
Lubricating your ATV control cables requires removing them first. Since they are of different types, they require different removal methods.
Removing a Clutch Cable
Start by lining the notch in the adjuster wheel to see where the cable is located. You can find it by the clutch lever. The best way to remove the control cable is to loosen the clutch lever.
Remove the clutch lever using the T-Handles. Gently pull the rubber guard to access the clutch lever bolt, and remove it with a wrench. Once you remove the bolt, the clutch lever easily pivots off the clutch cable.
Next, remove the other end of the cable that is connected to the actuating arm. You can find this below the left footrest.
Note that you don't need to remove the entire cable (clutch cable or throttle cable) from your ATV if you just want to lubricate it.
Removing a Throttle Cable
Removing a throttle cable can be more difficult than removing a clutch cable.
Start by removing the cover protecting the throttle cable. You might need to remove the seat and gas tank before you can access this, though. It all depends on your ATV model.
After doing this, remove the throttle lever on the right side of the handlebars. The procedure for this is similar to that of the clutch cable.
Lubricating the Cables on an ATV?
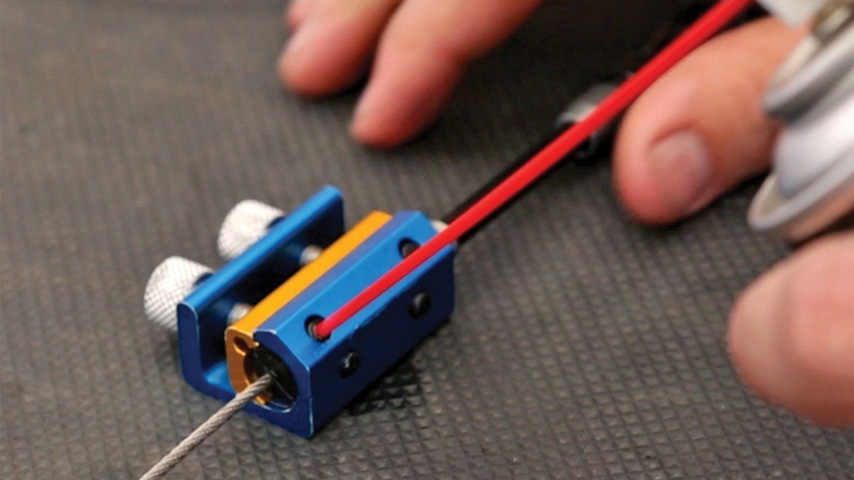
The required equipment to lubricate your control cables is a cable luber. Insert the top end of the cable into the cable luber tool.
Ensure the tool covers some of the cable's protective sheathing and some of its bare parts.
Spray the lube on the opening in the tool and hold your cable vertically, so the lubricant can flow downwards faster. The lubricant flowing down the cable helps clean and lubricate the cable.
You want to hold the tool with a rag to prevent spillage.
Give it a few short bursts until the lubricant leaks out. Avoid applying too much force, so it doesn't spill everywhere.
Also, move the cable back and forth to help the lubricant flow through.
Now that you are done lubricating the cable, reinstall it back to the vehicle.
Reinstall your control cable in the reverse order you removed it.
You can also consult your manufacturer's guide if you get stuck anywhere.


