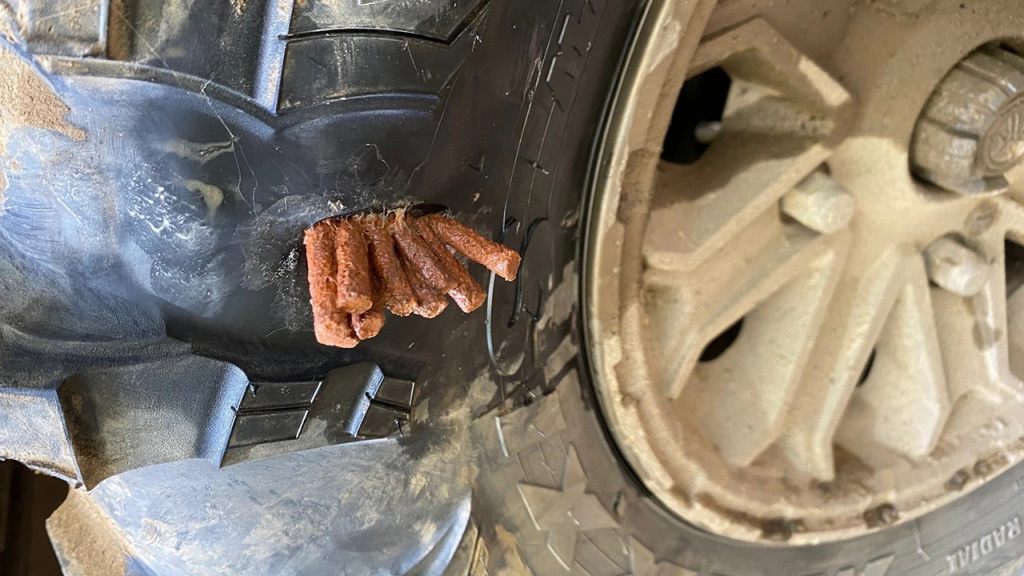
How to Repair an ATV Sidewall In 5 Minutes
Sidewalls are used and abused on your ATV tire. Tire sidewalls act as suspension to smooth out bumps and make it somewhat comfortable for you as the driver. But they often get damaged out adventuring. Luckily, it’s now possible to repair your ATV tire sidewall in just 5 minutes.

What Causes an ATV Tire Sidewall Puncture?
Big punctures and tire explosions are caused by overloaded vehicles. Your ATV may have one too many occupants, or tires inflated too high. Over time the buildup in pressure weakens the tire causing it to overheat and burst. Not ideal if you are out on the tracks having fun. In fact, they pose a big safety risk if you get a blowout whilst riding fast on your ATV.
Solution? Use a Bespoke ATV Patch Kit.
Patch kits are dedicated solutions to repair both the tread area and sidewall. GlueTread have an ATV tire repair kit that is ideal for this as you don’t have to remove your wheel from your ATV.
How to Repair ATV Sidewalls Fast
-
Take the GlueTread or equivalent repair kit and open it up. You should have included the adhesive, sandpaper, patch and marker or score tool.
-
Then locate your puncture or split on your ATV side wall. Remove the object that is piercing the sidewall and clean it up using a cloth and cleaning solution. If the area is not smooth, take the sandpaper from the kit and sand down the area around the split or puncture.
-
Apply a small amount of adhesive to the edge of the split or puncture in the sidewall. Then press down hard to try and close the split and flatten the edges of it on the sidewall. Leave for 30 seconds and sand any excess to leave a smooth finish.
-
Take your patch and cover the area that is split. Use a marker or score, gently mark out the edges of the patch on the sidewall of your ATV tire.
-
Take the patch away and apply adhesive, scattering droplets around the whole area of the patch will cover. Once you have applied adhesive to the whole area that the patch will cover.
-
The patch now needs to cover the adhesive and split in the sidewall. Firmly press it down and keep it pressed down for 30 seconds. This allows the adhesive to work its magic and seal the hole.
-
Once you have allowed a few minutes for the adhesive to cure, reinflate your tire using an air compressor or CO2 cannisters if you have them with you.
-
Test the repair to see if there are any leaks. Use a small amount of water to cover the edges of the repair patch to see if any air bubbles appear. If you do not have water, feel with your fingers around the edges of the repair patch for any air leaking.
If the sidewall split is smaller than the repair patch and you have followed the steps correctly then you are good to go! You have successfully repaired your sidewall in just 5 minutes.
Patch From the Inside
If bigger holes arise, then patching from the inside using a bigger patch is another way to repair your sidewall. Inside repairs last much longer as they are not exposed to the elements or at risk of rubbing against something that causes the repair to come loose. They do however take longer than 5 minutes to apply as they involve taking the ATV wheel off.
How to Remove the ATV Tire and Repair with Patch Kit
Once the wheel is removed, use two tire irons and their flat blades to take the tire off the rim. Make sure the tire is deflated. If it isn’t, push the center of the tires valve once you take the dust cap off.
Push one flat blade of an iron between the ATV rim and tire. Do the same with the other blade on the other side of the tire. Then go around the rim and remove the tire away from the edge using the blade until it meets back at the other blade. Repeat this on the other side of the tire with the other blade.
Repair steps
A tire patch kit comes with a tire marker, scuffer, rubber cement, tire patches and buffer tools.
-
Mark the spot on the tire that needs patching by using the tire marker.
-
Using the scuffer, rub the marked area to prepare it for the new patch. Make sure to remove the rubber pieces if any arise from rubbing.
-
Use the cement to spread over the scuffed area and hold on until it becomes sticky.
-
Take off the label from the rear of the patch. Stick it down to the area which you scuffed and added cement to earlier.
-
With the buffer tool, smooth the edges of the patch and remove any air bubbles. No gaps should be between the patch and the tires surface.
-
Leave for the cement to dry and the patch is safely installed before putting the tire back on the rim.


