How to Change or Upgrade ATV Tie Rods
Tie rods are a crucial part of your ATV's steering system, so it pays to recognize and look for the signs of failure and know how to change or upgrade ATV tie rods.
How Do Tie Rods Affect ATV Performance?
A failing ATV tie rod can interfere with your ability to steer, causing tires to pull in one direction or another, the steering wheel may shake at higher speeds, and the steering may feel loose. This is irritating, and it makes it more difficult to control the vehicle which could lead to accident.
You may lose the ability to steer at all if your tie rod fails.
What Can a Bad Tie Rod Cause?
If the potential for losing the ability to steer isn't bad enough, driving with bad tie rods can also cause early or uneven tire wear.
How Do I Know if My ATV Tie Rod is Bad?
There may be many ways to discover your ATV is bad.
You may notice:
- loose steering
- one or more tires pulling to one direction
- play in the steering or handlebars if you turn them while the machine is stopped
- shaking in the steering wheel, particularly at higher speeds
- squeaking or popping noises associated with steering
- unexplained tire wear
- a torn, worn, or missing dust boot on your tie rod
- rust or bends in the tie rod
Step-by-step Instructions for Replacing an ATV Tie Rod
This is an easy job that doesn't require and special equipment or tools, so you can definitely do it yourself.
Things you'll need:
- aftermarket tie rods
- a socket wrench with a long handle
- a wrench
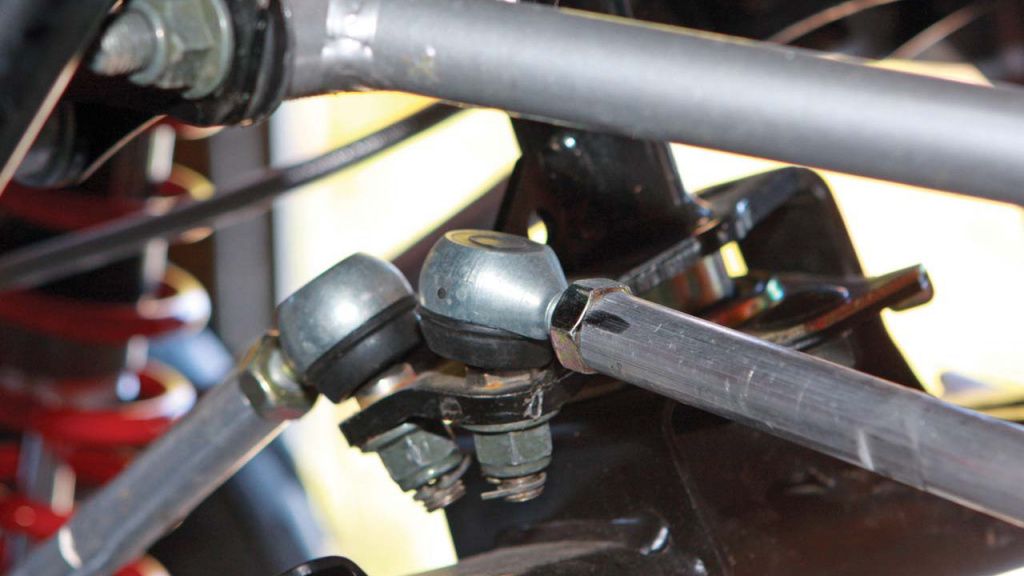
Tie rods are made up of three main parts, the tie rod itself and tie rod ends. The ends thread on and have nuts to lock them in. You adjust the length of them by threading and securing the tie ends.
Aftermarket tie rods come disassembled with all the parts you'll need. They should come with instructions, and assembling them is easy.
The one issue you may run into is confusion about the threads of the tie rod ends. The two ends thread in different directions. This is intentional. Follow the threading and don't try to force them to do something different or assume they're bad.
Jack up your ATV securely on jack stands and remove your tires.
You'll see the closest end of the tie rod positioned just above the A-arm.
You could take photos of the tie rod, including the ends behind the wheel hub and under the steering stem, before you remove them so you have no doubt how to reinstall them.
Remove the cotter pin holding the closest end of the tie rod in place, then loosen the nut. When you try to loosen the nut, it may also spin the tie rod end. If so, you'll need a wrench to hold the tie rod still while you turn the nut.
Repeat the last two steps on the other end of the tie rod.
Hold the old and new tie rods beside each other and determine if the ends are equally tightened. You want the length from the end of the tie rod to the tip of the tie rod ends to be the same on both the old and new parts. This is an easy way to judge if your new tie rod will fit.
There is a notch on the tie rod that indicates which direction the tie rod should be facing. The notch should be on the wheel side.
If you don't remember where the tie rods were, slip the tie rod under the A-arm and connect it in the first hole under the steering stem, then put the closest end of the tie rod in the hole behind the wheel hub.
Fit the new washer and nut where the tie rod sticks out of the hole, but don't tighten them all the way.
Do the same to the side closest to the inside of the machine.
Put your wheels back on and check the alignment. You may need to further tweak the fit of the tie rod and realign the tires.
When you are sure the tie rods are in place, fully tighten the nuts and add the cotter pins. You can bend the cotter pins around the nuts for added protection.
Situations When an ATV Tie Rod Needs to be Upgraded
There would be nothing wrong with you upgrading your stock tie rods anytime you choose. Aftermarket tie rods are thicker and more durable than stock tie rods, so you can prevent potential issues this way.
If you already have tie rod wear or damage, you could feasibly reshape a bent tie rod, but it will weaken it, so it won't be a long-lasting repair. Rusted or worn tie rods need to be replaced.
If only one of your tie rods is bad, you could replace only the one, but since you'll be upgrading when you replace it, why not go ahead and replace both so you have two new and improved tie rods?

