How to Fix Coolant in ATV Oil
When you’ve got coolant in your ATV oil, you need to do something about it right away. The first thing to do is drain your oil. That will get the coolant out of the oil, but you still have to figure out what caused the problem, or it will just get in there again. This post covers the reasons for coolant in ATV oil and tell you how to fix them.
Blown Head Gasket
These round, flat parts made of graphite sit between the cylinder and cylinder head. They form a seal between the compression chamber, oil passages, and coolant passages, and when they “blow,” you lose your seal.
If you discovered ATV coolant in your engine oil, the seal failed somewhere between a coolant passage and the engine oil. Your engine has these coolant passages built in to allow coolant to flow through it and keep its temperature down.
This isn’t a very common problem. You’re more likely for your head gasket to fail and allow coolant into the cylinder, but it can happen, and this post will help you deal with it.
You’ll be able to tell you have coolant in your ATV oil because:
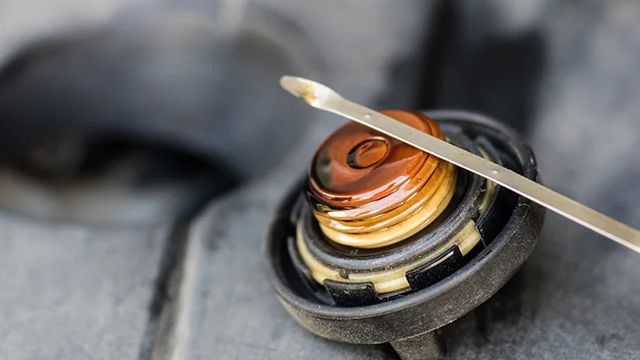
- The oil will have a tan, milky color and be frothy
- There will be white scum on the dipstick
- The oil level will probably be unusually high
- You’ll have an inexplicably low amount of coolant
- You’ll see white smoke from your engine
- You may hear air moving when you take out your dipstick
Causes of Head Gasket Failure
Head gasket failure is most commonly caused by overheating. But it can also be caused by wear and tear, not changing the coolant often enough, a warped cylinder head, or a frozen engine in the winter because you didn’t use sufficient four wheeler antifreeze. Head gaskets can also just get old. Make sure you determine what caused the failure so the replacement doesn’t fail too.
How to Fix a Blown Head Gasket
First, you can’t repair a head gasket. You just replace it.
To DIY, you’ll need:
- Precision
- Basic tools
- A gasket scraper
- A new head gasket
- Gasket dressing
- A quality torque wrench
Remove any parts that prevent you from accessing the cylinder head. Then remove the cylinder head. You’ll have to drain coolant from liquid-cooled engines.
There will be leftover bits of head gasket. Use the scraper but try not to damage the cylinder or cylinder head, or you may make it so the new head gasket won’t seal properly. Apply a small amount of gasket dressing and install the new head gasket.
This is a great opportunity to reseat your valves and change your oil stem valve seals.
Check your owner’s manual for the specifications to torque your cylinder head bolts and to get your engine timing right.
Failed Water Pump Seal
The water pump is attached to the engine because it is controlled by the engine. This means that if something goes wrong, ATV engine coolant can enter the crankcase and get into your engine oil. A problem could occur in the seal between the pump and the engine or in the pump’s o-ring. If the seal malfunctions, you may see water weeping from the pump into the pump housing.
Causes of Water Pump Seal Failure
This is usually caused by wear and tear, old age, or a fault in the o-ring.
How to Fix and Prevent Water Pump Seal Failure
The seal or the pump may need to be replaced, depending on the cause of the problem and the age of the pump.
Water pumps need to be changed pretty often. If you haven’t changed it in around five years, preemptively replace the gaskets, seal, and bearing. While you have the pump off, check out the impeller and shaft on the engine to make sure a problem isn’t brewing in there. This is an opportunity you don’t want to waste.
Frost Plug Leak
This is a rare problem, but one that can happen and lead to coolant in ATV oil. If you don’t appear to be having head gasket or water pump problems, you might look here.
Frost plugs are small, about the size of a dollar coin, made of metal, and cup shaped. They make it harder for ATV coolant to freeze inside the engine. You want to keep this from happening because the ice pressure can break the engine apart.
With most ATV models, the frost plugs are on the outside of the engine where you can easily see if they’re leaking. If yours are under your cam cover, you will have to remove this to check them for issues.
You may:
- See four wheeler coolant leaking on the outside of your engine
- Find coolant leaking between the engine and transmission
- Smell the sweet smell of heated coolant as coolant warms on the outside of the engine
- Notice coolant loss
- Experience engine overheating due to a coolant leak
What Causes Frost Plug Leaks
4 wheeler coolant freezing in the engine can push the frost plugs out. They can also just get pushed out over time as the engine expands and contracts and wiggles the plugs loose.
How to Fix Leaking Frost Plugs
If the leak was caused by frozen temperatures, you’ll need to make sure your engine isn’t damaged. You’ll also want to check your owner’s manual to make sure you have been using the right ATV antifreeze mixture.
You will need to remove the freeze plug(s), which may require destroying it. Use sandpaper to clean the hole and remove any corrosion, if you see any.
Install the new freeze plug. You can use a screwdriver or a pair of pliers. Once it’s in, cover it with sealant to provide extra protection.

