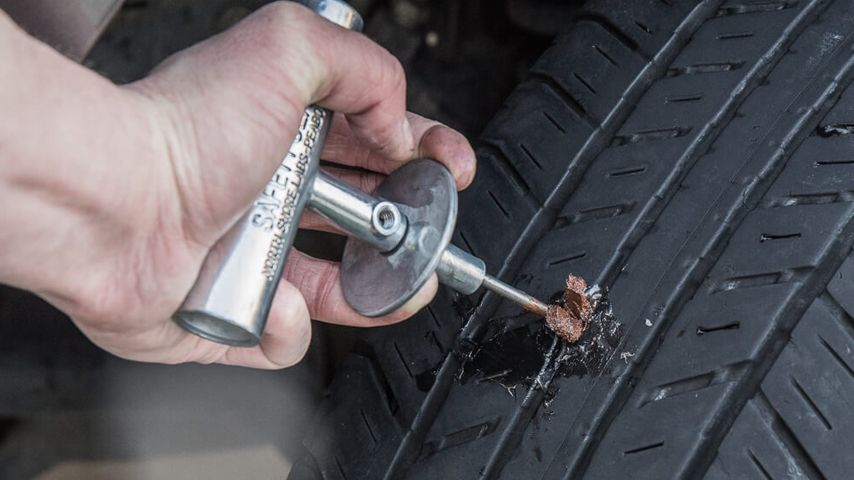
How to Patch ATV Tire with Tire Repair Kit
Repairing a puncture in your ATV tire can be a significant problem, especially if the blowout happens while you’re on the road. Luckily, there are some easy ways to patch up these holes so that you can continue enjoying your ride!

What causes Punctures?
Puncture wounds are usually caused by something sharp that has made its way into your bike's inner workings. This could be anything from glass shards or nails to pieces of metal piping or screws (in which case, those would probably injure someone if they were riding on their own). You'll need to check all around where these things may have entered into before starting any repairs so that nothing else gets stuck!
What caused the puncture should also be removed to stop further damage. It could be a nail, screw, or piece of glass. Some tire repair kits come with tools to do this easily.
How to Patch Your Tire – Step by Step
The first step is to remove the tire from your ATV’s rim. You can do this by loosening the valve stem nut and pulling it out, or by using a tire iron and prying it off the rim. If you’re using a repair kit with patches that require heat, now would be a good time to apply those patches.
Once you have removed your punctured tube from inside of your tire, use an air compressor and put four ounces of air pressure back into it (or five if you have a high-pressure bike). This will help eliminate any debris that might be in there that could cause another flat later down the road.
Carefully inspect your sidewall for cuts, tears, and bulges before proceeding with the repair process. If there are any obvious problems, call in a professional for help because it’s easier to get a new tire than repair one that’s damaged beyond repair.
Use one of the reamers to widen the hole and make enough room for a thread-cutting tool.
Make sure that you leave enough room for your plug, too. If you don't, then when you install the plug, it will be loose or won't fit at all.
Use your thread-cutting tool to create a thread inside of your tire. If you don't have a thread-cutting tool, use a screwdriver. Push in the plug with the insertion tool provided to lock it into place. Some kits will have you cement it first, but most don’t need it.
Using the insertion tool, push in the plug until it is flush with the surface of the tire. If necessary, use a hammer to push it in. If you need to use the cement, do it before pushing in the plug. Use a tool known as “curing gum” to secure your plug into place. Once you push it in, trim off the excess rubber tread around the outside of your tire so it’s smooth again. Inflate your tire and make sure it has been properly sealed by inspecting both sides when full.
If you notice any leakage, then you may need to do some extra work for a proper patch job. Your kit should come with instructions on how long to let your tire sit before inflating it and taking it for a ride (again, consult your manual).
Check the pressure in the tire after a few minutes of being inflated with the kit's pump and make sure that there is no further leakage at this point, as well as no visible damage or problems with the sealant used on either side of the tube before proceeding further with this process; if there are still issues with proper sealing or inflation after checking all four sides separately then repeat until everything looks normal again.


